Check GPS status in Android Studio

Objective:
To check GPS status

Function:
When the button is pressed, small pop up will be displayed to inform the status of GPS. GPS satellites has to be selected by user manually. You cannot enable the GPS directly in your code for various reasons such as battery drain and privacy.

IDE:
Android Studio 1.0.2

Source Code:
The project can be downloaded from here.


Result:


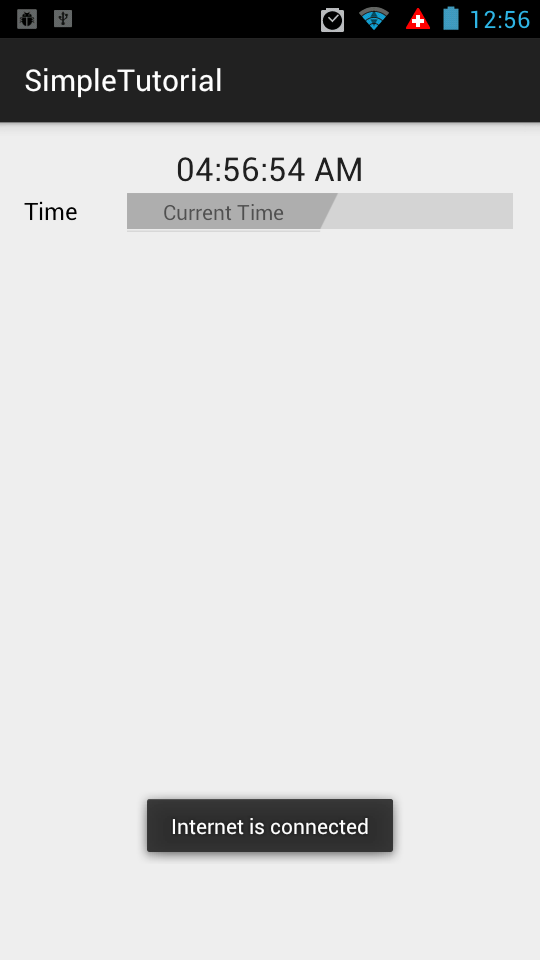
Retrieve current time using Json in Android Studio

Objective:
To retrieve current time using Json

Function:
When the button is pressed, small pop up will be displayed to inform the status of network connectivity. Once network is established, Json data will be retrieved and display it on TextView. Time is based on GMT.

IDE:
Android Studio 1.0.2

Source Code:
The project can be downloaded from here.

Result:


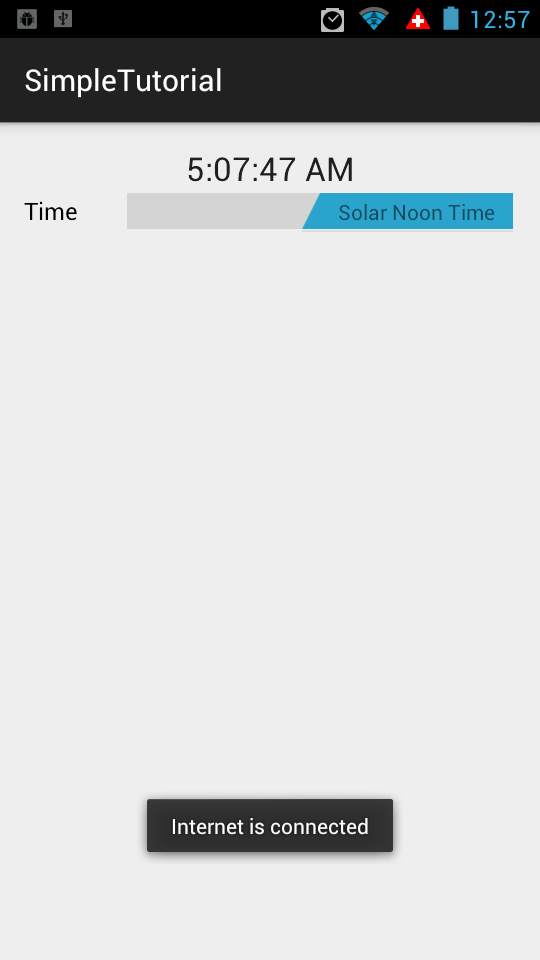
Toggle Solar Noon and current time using Json in Android Studio

Objective:
To toggle current time and solar noon time using Json

Function:
When the toggle is pressed, small pop up will be displayed to inform the status of network connectivity. Once network is established, Json data will be retrieved and display it on TextView.

IDE:
Android Studio 1.0.2

Source Code:
The project can be downloaded from here.

Result:


Check simple network connection in Android Studio

Objective:
To check simple network connectivity

Function:
When the button is pressed, small pop up will be displayed to inform the network connection.

IDE:
Android Studio 1.0.2

Source Code:
The project can be downloaded from here.

Result:


Content of AndroidManifest.xml
Explanation: add two line in AndroidManifest.xml to permit internet connection


Content of MainActivity.java file:
package com.example.osdevlab.simplefragmenttutorial;

import android.app.FragmentManager;
import android.app.FragmentTransaction;
import android.os.Bundle;
import android.support.v7.app.ActionBarActivity;


public class MainActivity extends ActionBarActivity {
    @Override
    protected void onCreate(Bundle savedInstanceState) {
        super.onCreate(savedInstanceState);
        setContentView(R.layout.activity_main); //set to activity_main.xml

        /*way of adding fragment with java*/
        //FragmentOne is the class which inflate the fragment_one.xml and return the view
        FragmentOne myFragment = new FragmentOne();
        FragmentManager manager = getFragmentManager();
        FragmentTransaction transaction = manager.beginTransaction();
        //'container' is android id in activity_main.xml
        //add android:id="@+id/container" in activity_main.xml
        transaction.add(R.id.container, myFragment, "main_layout_container");
        transaction.commit();
    }
}


Content of FragmentOne.java file:

package com.example.osdevlab.simpletutorial;


import android.app.Fragment;
import android.content.Context;
import android.net.ConnectivityManager;
import android.net.NetworkInfo;
import android.os.Bundle;
import android.view.LayoutInflater;
import android.view.View;
import android.view.ViewGroup;
import android.widget.Button;
import android.widget.Toast;

/**
 * Created by osdevlab on 12/29/14.
 */
public class FragmentOne extends Fragment {

    Context context;

    @Override
    public View onCreateView(LayoutInflater inflater, ViewGroup container, Bundle savedInstanceState) {

        // Inflate the layout with fragment_one.xml
        View view = inflater.inflate(R.layout.fragment_one, container, false);

        //create Button 'buttonPress' and link with button id from fragment_one.xml
        Button buttonPress = (Button) view.findViewById(R.id.button);

        //returns the Activity the Fragment is currently associated with
        //In Fragment, this step requires to pass context to other class.
        //see example below for context.getSystemService
        context = getActivity();

        /*define OnClickListener here*/
        buttonPress.setOnClickListener(new View.OnClickListener() {
            public void onClick(View v) {

                //ConnectivityManager is the class that answers queries about the state of network connectivity
                //example here for context is context.getSystemService instead of getSystemService
                ConnectivityManager connMgr = (ConnectivityManager)
                        context.getSystemService(Context.CONNECTIVITY_SERVICE);
                NetworkInfo networkInfo = connMgr.getActiveNetworkInfo();
                if (networkInfo != null && networkInfo.isConnected()) {
                    // small popup to show the status of network connection
                    Toast.makeText(context, "Internet is connected",
                            Toast.LENGTH_SHORT).show();

                } else {
                    Toast.makeText(context, "Internet is not connected",
                            Toast.LENGTH_SHORT).show();
                }
            }
        });

        return view;
    }
}


Create Simple Fragment with button in Android Studio

Objective:
To create a simple fragment with button

Function:
Text View from fragment is changed when the button is pressed.

IDE:
Android Studio 1.0.2

Source Code:
The project can be downloaded from here.

Result:


Content of MainActivity.java file:
package com.example.osdevlab.simplefragmenttutorial;

import android.app.FragmentManager;
import android.app.FragmentTransaction;
import android.os.Bundle;
import android.support.v7.app.ActionBarActivity;


public class MainActivity extends ActionBarActivity {
    @Override
    protected void onCreate(Bundle savedInstanceState) {
        super.onCreate(savedInstanceState);
        setContentView(R.layout.activity_main); //set to activity_main.xml

        /*way of adding fragment with java*/
        //FragmentOne is the class which inflate the fragment_one.xml and return the view
        FragmentOne myFragment = new FragmentOne();
        FragmentManager manager = getFragmentManager();
        FragmentTransaction transaction = manager.beginTransaction();
        //'container' is android id in activity_main.xml
        //add android:id="@+id/container" in activity_main.xml
        transaction.add(R.id.container, myFragment, "main_layout_container");
        transaction.commit();
    }
}


Content of FragmentOne.java file:

package com.example.osdevlab.simplefragmenttutorial;

import android.app.Fragment;
import android.os.Bundle;
import android.view.LayoutInflater;
import android.view.View;
import android.view.ViewGroup;
import android.widget.Button;
import android.widget.TextView;

/**
 * Created by osdevlab on 12/29/14.
 */
public class FragmentOne extends Fragment {


    @Override
    public View onCreateView(LayoutInflater inflater, ViewGroup container, Bundle savedInstanceState) {

        // Inflate the layout with fragment_one.xml
        View view = inflater.inflate(R.layout.fragment_one, container, false);

        //create Button 'buttonPress' and link with button id from fragment_one.xml
        Button buttonPress = (Button) view.findViewById(R.id.button);
        //create TextView 'textViewPress' and link with texView id from fragment_one.xml
        final TextView textViewPress = (TextView) view.findViewById(R.id.textView);

        /*define OnClickListener here*/
        buttonPress.setOnClickListener(new View.OnClickListener() {
            public void onClick(View v) {
                //when button is pressed, textViewPress is changed to following message
                textViewPress.setText("Button has been Pressed");
            }
        });

        return view;
    }


}

Create Simple Fragment in Android Studio

Objective:
To create a simple fragment

Function:
Text View from both main layout and fragment can be view on same screen. The reason is to show that fragment can be view and run on top of the main layout.

IDE:
Android Studio 1.0.2

Source Code:
The project can be downloaded from here.

Result:


Explanation:
Code with commented with to explain further more.

Content of MainActivity.java file:

package com.example.osdevlab.simplefragmenttutorial;

import android.app.FragmentManager;
import android.app.FragmentTransaction;
import android.os.Bundle;
import android.support.v7.app.ActionBarActivity;


public class MainActivity extends ActionBarActivity {
    @Override
    protected void onCreate(Bundle savedInstanceState) {
        super.onCreate(savedInstanceState);
        setContentView(R.layout.activity_main); //set to activity_main.xml

        /*way of adding fragment with java*/
        //FragmentOne is the class which inflate the fragment_one.xml and return the view
        FragmentOne myFragment = new FragmentOne();
        FragmentManager manager = getFragmentManager();
        FragmentTransaction transaction = manager.beginTransaction();
        //'container' is android id in activity_main.xml
        //add android:id="@+id/container" in activity_main.xml
        transaction.add(R.id.container, myFragment, "main_layout_container");
        transaction.commit();
    }
}


Content of FragmentOne.java file:
package com.example.osdevlab.simplefragmenttutorial;

import android.app.Fragment;
import android.os.Bundle;
import android.view.LayoutInflater;
import android.view.View;
import android.view.ViewGroup;

/**
 * Created by osdevlab on 12/29/14.
 */
public class FragmentOne extends Fragment {


    @Override
    public View onCreateView(LayoutInflater inflater, ViewGroup container, Bundle savedInstanceState) {

        // Inflate the layout with fragment_one.xml
        return inflater.inflate(R.layout.fragment_one, container, false);
    }


}

QT database; create table with helper class


The complete project can be downloaded from here. Instead of writing very messy code in mainwidow.h, the helper class is to minimize coding and to improve clarity. 

Function: 
(1) To open database at start up
(2) To create or delete a table from database


At mainwindow.h
(1) 'database' file is passed to setDataBasePath. This will return bool operator and check whether the database can be opened or not. 'database.db' is created at application folder.

(2) When "Create Table" is clicked, status of 'Creation of Table' changed to 'Table Created'. If table already exists at database, the status changes to 'Failed to create table'.

(3) Similarly, when "Drop Table" is clicked, status of 'Creation of Table' changed to 'Table Dropped'. If table DOES NOT exist at database, the status changes to 'Failed to drop the table'.

(4) Take note that, same table name is created and deleted during this program.


#include "mainwindow.h"
#include "ui_mainwindow.h"
MainWindow::MainWindow(QWidget *parent) :
        QMainWindow(parent), ui(new Ui::MainWindow)
{
    ui->setupUi(this);
    if (dBH.setDataBasePath("database")) {
        ui->label_status->setText("Connected");
    } else {
        ui->label_status->setText("Failed");
    }
}
MainWindow::~MainWindow() {
    delete ui;
}
void MainWindow::on_createTable_clicked() {
    bool isTableCreated = dBH.createTable();
    if (isTableCreated) {
        ui->status_tableCreated->setText("Table Created");
    }
    else {
        ui->status_tableCreated->setText("Failed to create table");
    }
}
void MainWindow::on_dropTable_clicked() {
    bool isTableDropped = dBH.dropTable();
    if (isTableDropped) {
        ui->status_tableCreated->setText("Table Dropped");
    }
    else {
        ui->status_tableCreated->setText("Failed to drop the table");
    }
}


At databasehelper.h, all of the necessary steps and traps are properly commented. Please go through.


#include "databasehelper.h"
#include <QDebug>

DatabaseHelper::DatabaseHelper() //default constructor
{
    //needed it in constructor otherwise, database can't be opened from other function call; werid
    myDataBase = QSqlDatabase::addDatabase("QSQLITE"); //QSLITE must be exact
}

bool DatabaseHelper::setDataBasePath(QString filename) {

//another file *.db will be created if the file is not presented on the system
    QString dbPath = QCoreApplication::applicationDirPath() + "/" + filename
            + ".db";
    myDataBase.setDatabaseName(dbPath);
    if (myDataBase.open()) {

        qDebug() << "databased is opened sucessfully ";
        return true;
    } else {
        qDebug() << "failed to open databased";
        return false;
    }
}

bool DatabaseHelper::createTable() {
    if (myDataBase.isOpen()) {

        QSqlQuery query(myDataBase);
        //you can use "create table if not exists" but it will be always
        //successful to execute this following command

        //Name of table cannot be variable//
        //so have to hard code it//
        //it is just sqlite way//
        bool ret = query.exec("create table studentTable"
                "(id integer primary key, "
                "firstname varchar(20), "
                "lastname varchar(30), "
                "age integer)");

        if (ret) {
            qDebug() << "table created";
            return true;
        } else {
            qDebug() << "faied to crate table";
            return false;
        }
    } else {
        return false;
    }
}

bool DatabaseHelper::dropTable() {

    if (myDataBase.isOpen()) {
        QSqlQuery query(myDataBase);
        bool ret = query.exec("drop table studentTable");

        if (ret) {
            qDebug() << "table dropped";
            return true;
        } else {
            qDebug() << "faied to drop the table";
            return false;
        }
    } else {
        return false; //return false if failed to open database
    }
}

DatabaseHelper::~DatabaseHelper() //default deconstructor
{

}

How to upload to github: Tutorial for Ubuntu


If you haven't get a git hub account, create one here. Then click new repository from top right corner of your web browser as shown in following picture.

Once the repository is created, you will be given a link; just like in the following picture. You need it very soon.


Now we will create a folder name called gitHub and go into this folder.
$ cd ~/Documents/
$ mkdir gitHub
$ cd gitHub

Once the folder is created, we clone empty repository by following command.
$ git clone <link given to you>
For example;
$ git clone https://github.com/osdevlab/Testing.git


Then you will see this kind of message
Cloning into 'Testing'...
warning: You appear to have cloned an empty repository.
Checking connectivity... done.

Now 'Testing' folder will be created by previous command. Now we go to 'Testing' folder  and create some simple text and save it.
$ cd Testing
$ gedit hellogithub.txt


We will want to see what changes are made in this 'Testing' folder. You can do it by typing following command.
$ git status

Then you will get this kind of message after that
On branch master

Initial commit

Untracked files:
  (use "git add <file>..." to include in what will be committed)

hellogithub.txt

nothing added to commit but untracked files present (use "git add" to track)

Now we need add the changes in order to sync to repository.
you can specifically add the file
$ git add hellogithub.txt

OR
you can add any files which are affected by the changes made by you.
$ git add --all

You need to specify the user name and email to git hub. You only need it for first time.These are the sample to setup user name and email.

$ git config --global user.email "you@example.com"
$ git config --global user.name "Your Name"

So for example;
$git config --global user.email "osdevlab@email.com"
$git config --global user.name "osdevlab"

Now we can first commit our first file. This step is required to track your change with useful info such as "first commit". This reflects the file in repository which is going to be committed for first time. You can also write a comment like "first try" or something like that.

$ git commit -m "first commit"


This step is where you really upload your files to git hub.
$ git push -u origin master

It will ask your user name and password. Just provide these and you are good to go. After your user name and password are provided, you might see the message below.

Counting objects: 3, done.
Writing objects: 100% (3/3), 230 bytes | 0 bytes/s, done.
Total 3 (delta 0), reused 0 (delta 0)
To https://github.com/osdevlab/Testing.git
 * [new branch]      master -> master
Branch master set up to track remote branch master from origin.

For Subsequent uploading,
Go to the folder that has been setup with git
$ git add --all
$ git commit -m "subsequent commit"
$ git push -u origin master
Then it will ask for user name and password. Fill it in and you will see latest change in your repository.


How to install jdk 8 on ubuntu

Uninstall any java openjdk or old jdk from the system
$ sudo apt-get purge openjdk*
$ sudo apt-get purge oracle-java*

Install java PPA repository to the system
$ sudo add-apt-repository ppa:webupd8team/java
$ sudo apt-get update
$ sudo apt-get install oracle-java8-installer

Setup java environment
$ sudo apt-get install oracle-java8-set-default


When you start programming in Qt, if you encounter the following error in ubuntu
cannot find -lGL 
Then install the library by
sudo apt-get install libgl1-mesa-dev

How to install Qt on Ubuntu

Download Qt from here.
Assume it was downloaded to Download folder.
First, go to Download folder.
cd ~/Downloads/
Change the permission of installer.
chmod +x qt-opensource-linux-x64-1.6.0-6-online.run
Then run installer
./qt-opensource-linux-x64-1.6.0-6-online.run

If successfully, it should be like this following image.